How to Enhance Image Quality in Photoshop: Step-by-Step Tutorial
Photoshop is one of the most powerful tools for improving image quality. With the right techniques, you can transform blurry, dull, or low-resolution images into sharp, vibrant visuals.
This step-by-step guide covers sharpening, noise reduction, resolution enhancement, and plugin suggestions—plus a few pro tips you won’t find in basic tutorials.
1. Start with Basic Adjustments
Before advanced edits, make basic corrections to bring out hidden details:
- Brightness & Contrast — Image → Adjustments → Brightness/Contrast
- Levels or Curves — Correct tones and colors for a balanced look
- Crop Tool — Refine aspect ratio and composition for better focus
2. Sharpening & Detail Enhancement
Using Unsharp Mask
This classic Photoshop tool increases edge contrast for sharper results:
- Amount — Controls intensity of sharpening
- Radius — Defines how far out from edges the sharpening applies
- Threshold — Determines what counts as an “edge”
Pro Tip: Switch to Lab Color mode, sharpen only the Lightness channel, then switch back to RGB. This keeps colors clean while improving detail.
3. Noise Reduction
Too much sharpening can amplify noise, so reduce grain first:
- Filter → Noise → Reduce Noise — Adjust strength while preserving edges
- In Adobe Camera Raw, use Sharpening and Color Noise Reduction sliders together for balanced results
4. Increasing Resolution
Photoshop Super Resolution (AI-Powered)
- Open the image in Camera Raw
- Right-click → Enhance → Select Super Resolution
- AI processing increases pixel count up to 4× while preserving details
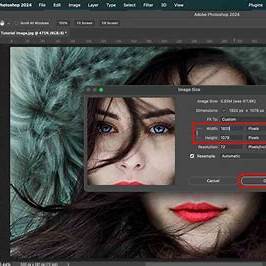
Manual Resizing
- Image → Image Size → Enable Resample
- Choose Preserve Details 2.0 for best results
- Pro Tip: Use incremental scaling (e.g., 110% multiple times) for better quality control than one large jump
5. Recommended Photoshop Plugins
- Topaz Gigapixel AI — Excellent for extreme upscaling with minimal quality loss
- Alien Skin Blow Up — Retains film-like grain and avoids digital artifacts during enlargement
6. AI Enhancement Alternative
If you want speed without manual work, try ImgEnhancer AI:
- Upload your image
- Let AI automatically sharpen, upscale, and reduce noise
- Download a high-resolution, polished result in seconds
You can also compare a Photoshop-edited version with an AI-enhanced version to decide which works best for your project.
7. Key Takeaways
- Sharpen selectively — Avoid halos by targeting only needed areas
- Reduce noise early — Sharpening works better on clean images
- Use AI for speed — Photoshop for full control, AI for efficiency
- Scale gradually — Improves results on big enlargements
Final Thought:
Photoshop gives unmatched control, but AI tools like ImgEnhancer AI can save hours and deliver professional results instantly. A hybrid approach—basic corrections in Photoshop, final polish with AI—often produces the best outcome.